Pipedream is a powerful serverless integration platform that allows developers to easily connect hundreds of apps and APIs, enabling rapid construction of automated workflows. Users can write custom logic using JavaScript, Python, and other languages without managing any infrastructure.
It supports event-driven architecture and integrates with popular services like Slack, Notion, GitHub, and Stripe. Pipedream is especially suited for building webhooks, data synchronization, notification systems, and other automation scenarios, significantly boosting development efficiency and flexibility.
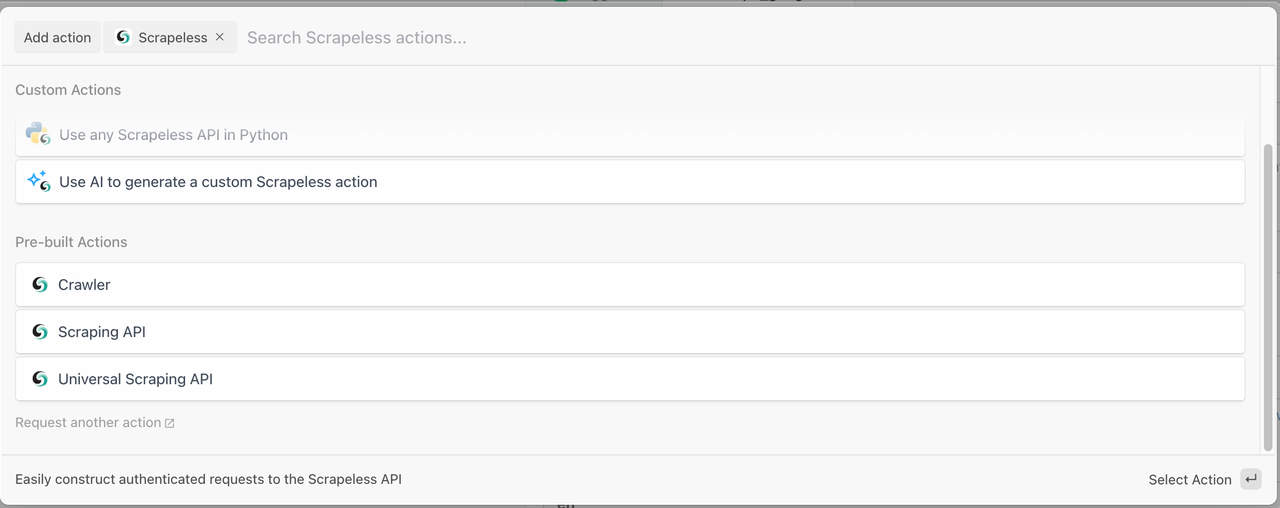
Scrapeless provides the following modules within Pipedream:
1. Crawler
- Crawler Scrape: Extract data from a single webpage.
- Crawler Crawl: Crawl a website and its linked pages to extract comprehensive data.
2. Scraping API
- Easily access and retrieve rich search data from Google SERP and Google Trends.
3. Universal Scraping API
- Access protected or dynamic pages. Automatically handles anti-scraping mechanisms.
How to Create a Knowledge Graph Intelligent Crawling System (Pipedream + Scrapeless)
Prerequisites
- You have registered on Scrapeless and obtained an API token.
- You have a Discord Webhook URL (for sending notifications).
First, you’ll need to complete the following setup:
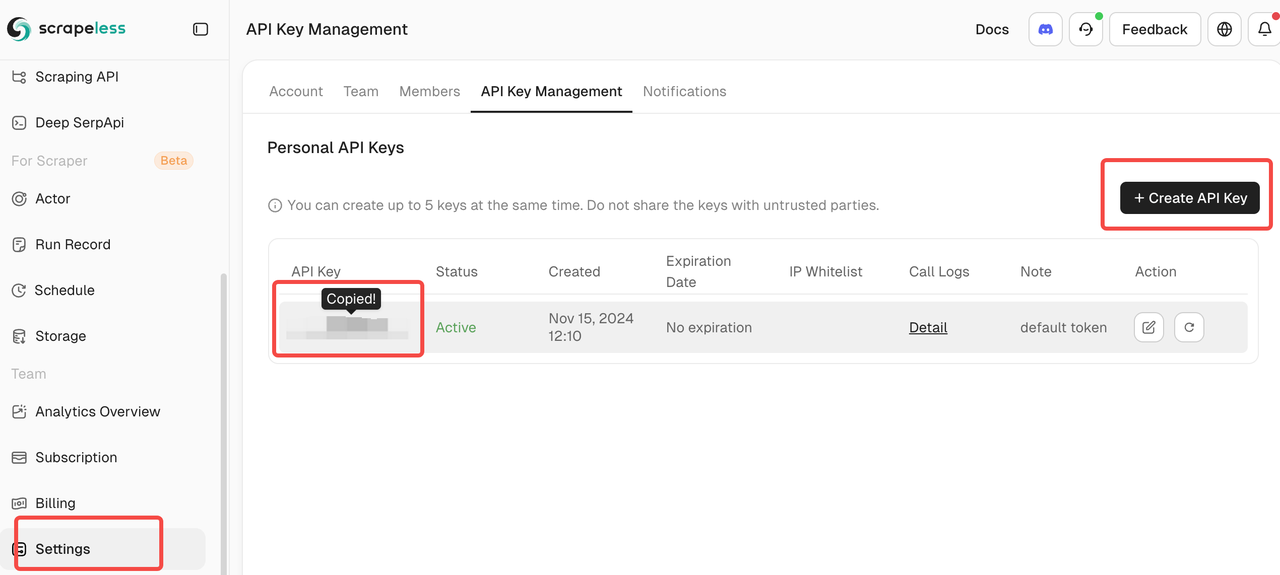
- Scrapeless API Key: Please sign up for a Scrapeless account. Once registered, you can access your API key from the dashboard.
- Pipedream Account: Create a Pipedream account.
Step 1: Set Up Your Scrapeless API Key in Pipedream
You need to log in to your Scrapeless account and go to the dashboard to obtain your API key.
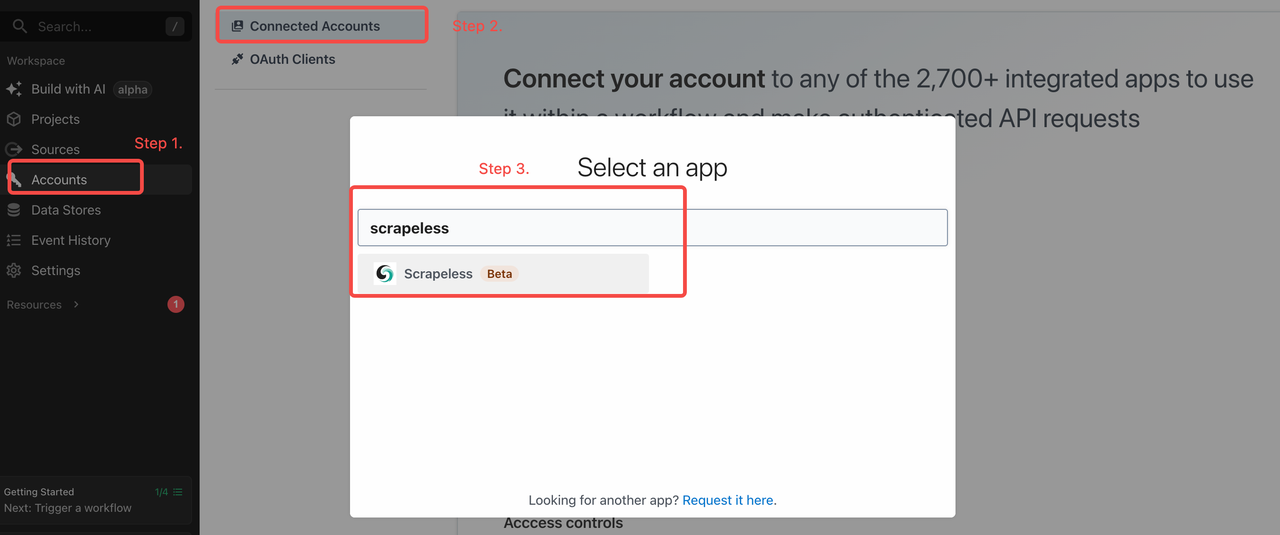
Once you have it, go to the "Accounts" tab in Pipedream and add the key there, as shown below:
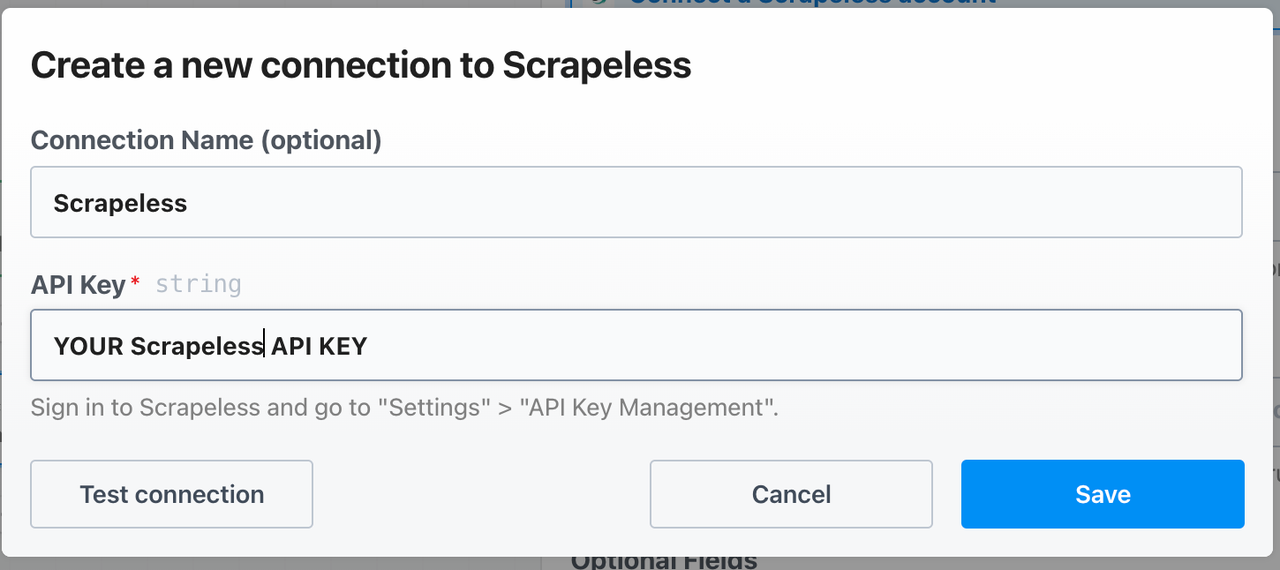
After that, set your API key like this:
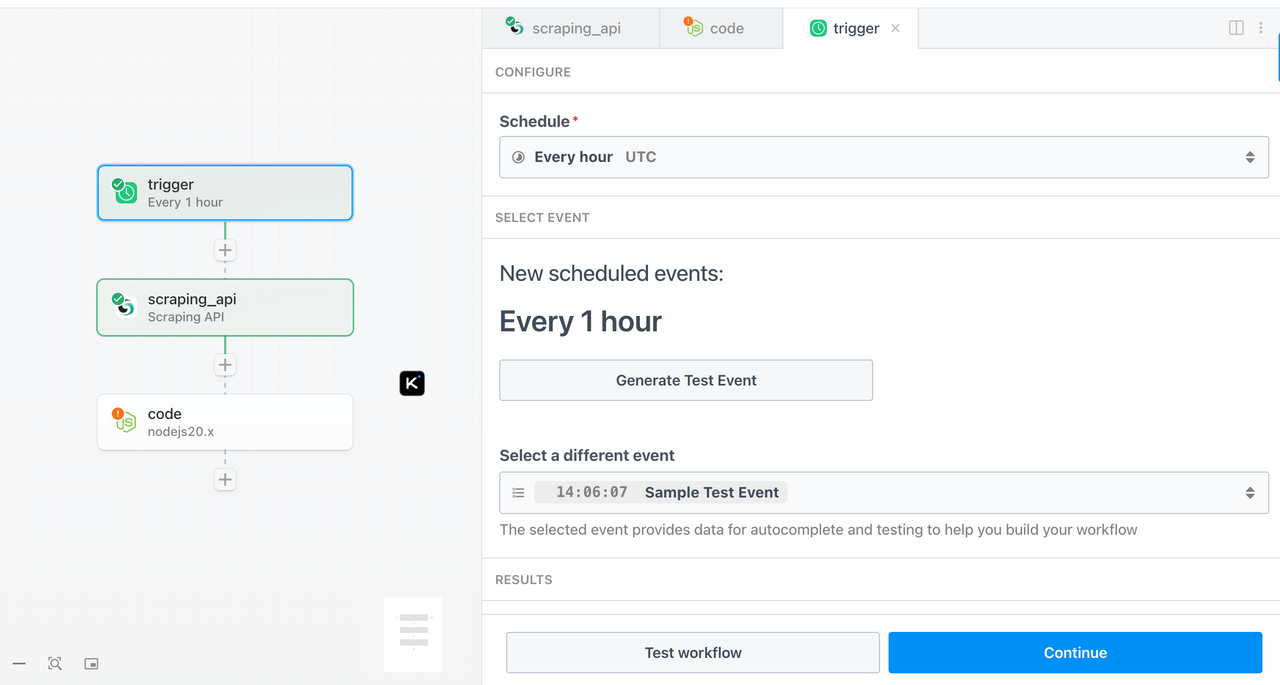
Step 2: Add a Trigger - schedule_trigger
- Type: Schedule
- Trigger Time: Every day at 08:00 (UTC)
- Method: Use either Cron or a fixed time interval
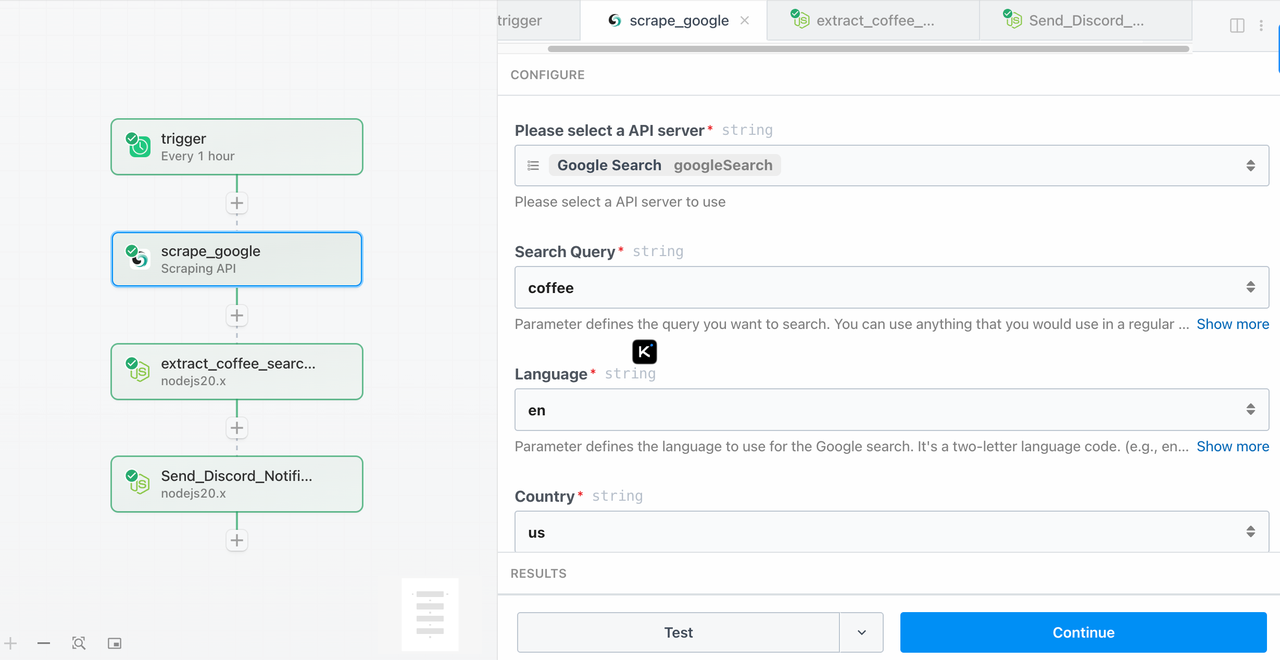
Step 3: Use Scrapeless to Search for Knowledge Panel Information of a Specific Keyword
Component:
google-search
Parameter Settings:
query: coffeegl: us (optional)hl: en (optional)
Step 4: Extract Information (extract_coffee_search_results)
This step extracts the knowledge panel information from the keyword data obtained in the previous step.
Add a Node.js code step with the following code:
export default defineComponent({
  async run({ steps }) {
    const searchResult = steps.scrape_google?.$return_value;
    const webResults = searchResult?.knowledge_graph.web_results

    if (!searchResult || !webResults) {
      throw new Error("❌ No valid results returned from Scrapeless Google Search.");
    }

    const links = webResults.map((item) => item.link)

    return {
      links,
    };
  }
});
Step 5: Send Discord Notification (Send_Discord_Notification)
This step sends the information obtained in Step 4 to your specified Discord channel.
Add a Node.js step with the following example code:
import { axios } from "@pipedream/platform";

export default defineComponent({
  async run({ steps, $ }) {
    const results = steps.extract_coffee_search_results.$return_value?.links || []
    console.log("result", results)
    const sendLinks = results.slice(0, 5)

    if (!sendLinks || sendLinks.length === 0) {
      console.log("✅ No search results to notify.");
      return { status: "no_results" };
    }

    const webhookUrl = "https://discord.com/api/webhooks/1381829187223949404/mweRKdQfJmA5OskoSZ0V_IApucOrMK7AHxN4YaAvjE3SRzp1xnbK4SFZLvMYjwnIFy1V"; // 🟡 Please replace it with your webhook

    const lines = sendLinks.map(r => `📌 ${r}`).join("\n\n");

    const message = {
      content: `📡 **Keyword Monitor: "coffee"**\n\n${lines}\n\n⏰ Detected at: ${new Date().toLocaleString()}`
    };

    try {
      const res = await axios($, {
        method: "POST",
        url: webhookUrl,
        headers: {
          "Content-Type": "application/json"
        },
        data: message,
      });

      return { status: "sent", res };
    } catch (err) {
      console.error("❌ Discord webhook failed:", err);
      return { status: "error", error: err.message };
    }
  },
});
Replace the URL in this line with your own Discord Webhook:
const webhookUrl = "https://discord.com/api/webhooks/your_webhook_id/your_webhook_token";If you don’t have a Webhook yet, you can create one in Discord as follows:
- Open the channel where you want to send notifications.
- Click Channel Settings > Integrations > Webhooks.
- Create a new Webhook and copy its URL to use as the webhookUrl mentioned above.
Preview (Message Sent)
When the Jasper.ai page changes, you will receive a message like this in Discord:

At Scrapeless, we only access publicly available data while strictly complying with applicable laws, regulations, and website privacy policies. The content in this blog is for demonstration purposes only and does not involve any illegal or infringing activities. We make no guarantees and disclaim all liability for the use of information from this blog or third-party links. Before engaging in any scraping activities, consult your legal advisor and review the target website's terms of service or obtain the necessary permissions.
